
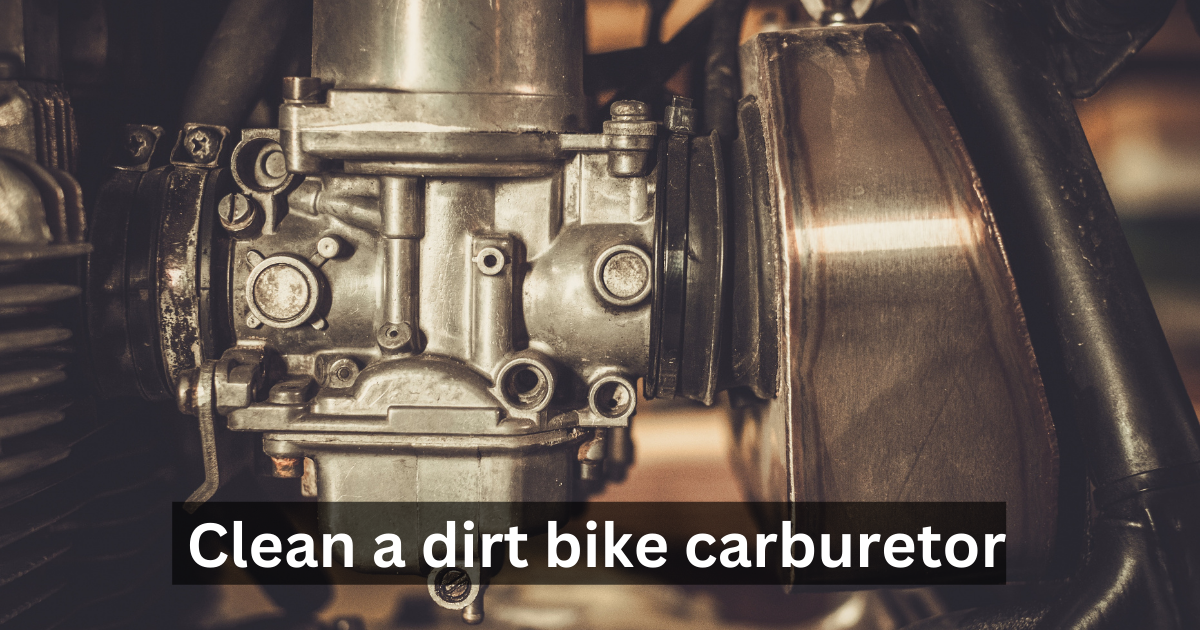
To optimize your dirt bike’s performance, it’s essential to roll up your sleeves and occasionally clean the carburetor. A crucial component, a dirt bike’s carburetor ensures the proper mixture of air and fuel for efficient combustion. However, as time passes, debris and buildup can hinder its performance, ultimately affecting your overall riding experience.
In this guide, we will provide you with clear and detailed instructions on how to clean your dirt bike carburetor. By following these steps, you can ensure that your bike operates efficiently and has a longer lifespan. Whether you’re an experienced rider or just starting out, we’ll walk you through each stage of the cleaning process, including inspection and reassembly. Let’s begin!
Understanding the Function of a Dirt Bike Carburetor
If you own a dirt bike, it’s important to have an understanding of the carburetor and its function as it plays a crucial role in maintaining your ride. Essentially, the carburetor is responsible for mixing air and fuel in the correct ratio for combustion in internal combustion engines. It’s a vital component of your dirt bike that significantly impacts its performance and efficiency.
The carburetor is a vital component in an engine’s fuel system. It operates on a simple principle, allowing air to flow through an open pipe, called the “barrel” or “throat,” into the cylinders of the engine. Within this pipe, there is a narrow section known as the “venturi,” and a valve called the “butterfly valve.” The butterfly valve plays a crucial role in regulating the precise amount of air and fuel that enters the engine. By swinging open or closed, it controls this airflow, contributing to optimal combustion within the engine.
One important component is the “fuel jet,” which sprays fuel into the carburetor. The fuel then mixes with the air in the venturi. This mixture of air and fuel is drawn into the engine through a pressure difference created by the downward movement of the piston. The “choke valve” helps regulate the combination, affecting how your dirt bike starts and performs under various weather conditions.
When the engine consumes fuel, it creates a drop in pressure within the carburetor. To remedy this, additional fuel is drawn from a reservoir or bowl into the carburetor. The level in this bowl is maintained constant using a mechanism called “float and needle,” which operates similarly to that found in a toilet tank.
Proper maintenance of every component of your carburetor is crucial. Neglecting maintenance can result in the accumulation of dirt and debris, which can negatively impact your bike’s performance.
The Signs of a Dirty Carburetor
In the world of dirt bikes, the carburetor is like the heart of the engine. Just like a clean and healthy heart ensures optimal performance, a clean carburetor is essential for your bike to run smoothly. On the other hand, a dirty carburetor can lead to performance issues and hinder your biking experience. That’s why it’s crucial to know how to recognize the signs of a dirty carburetor and take proper maintenance steps for your bike.
Removing the Carburetor from Your Dirt Bike
The first step towards cleaning your dirt bike carburetor is getting it out of your bike. Here are the steps you need to follow:
Switch off the Bike:
First and foremost, turn off your dirt bike. Ensure it is stable and properly supported before you start.
Locate the Carburetor:
You’ll find the carburetor adjacent to the engine. To be sure, you can refer to your bike’s manual.
Disconnecting Fuel Lines and Cables:
Carefully disconnect the fuel lines and ensure there are no leaks. Then, remove the cables connected to the throttle slide, making note of their arrangement.
Loosen Clamps:
Disconnect the clamps that secure the carburetor in place. These clamps are usually used to attach the carburetor to both the engine intake and airbox.
Remove the Carburetor:
After loosening the clamps, it is now possible to carefully slide out the carburetor. It is crucial to handle this process with gentleness to prevent any potential damage to the delicate components of the carburetor. By exercising caution and being
Cleaning the Carburetor Jets and Passages
To ensure a comprehensive cleaning of the carburetor jets and passages on your dirt bike, the following step-by-step guide will provide you with clear explanations and detailed instructions: 1. Begin by gathering all the necessary tools
Prepare Your Workstation:
Before starting the task, make sure you have a clean and well-lit workspace. Organize your tools and have carburetor cleaner readily available. This level of preparation will help prevent any loss of small components and make the task easier to manage.
Dealing with Carburetor Jets:
To clean your carburetor effectively, start by locating the pilot jet and main jet. These crucial components are typically found in the float bowl area. It’s important to be thorough when cleaning these areas as they can easily become clogged with dirt or debris. Carefully unscrew each jet, taking note of its position and orientation for easy reassembly later on.
Cleaning Process:
To clean the jets, use carburetor cleaner. Spray each jet’s interior, focusing on the tiny holes. The cleaner often comes with straw-like attachments that make clearing the jets more effective. Allow the cleaner to soak in for approximately 10 minutes.
Inspection:
After soaking, inspect each jet to ensure that the cleaner has effectively removed all visible dirt. Hold them up to a light source and verify that you can see through them. If you cannot, repeat the cleaning process or use a jet cleaning tool or compressed air for further cleaning.
Clearing out Passages:
It’s not only important to clean the jets of your carburetor, but also the passages. Make sure to spray carburetor cleaner into these passages and ensure it flows out on the other end. This will effectively remove any residues that may be blocking these openings.
Rinsing and Drying the Carburetor Parts
After thoroughly cleaning the carburetor components, the next important step is to rinse and dry them properly. Taking care during this stage ensures that no residue of the cleaning solvent remains on the parts.
To begin, rinse each part using clean water. Avoid using a garden hose and instead use a gentle stream of water to effectively remove any leftover residue, dirt, or cleaning solution. A kitchen sink or washbasin is an ideal location for this task. If there are any stubborn stains or dirt that remain after rinsing, gently scrub them off with a soft brush.
After rinsing, it is crucial to thoroughly dry each part to prevent any moisture from causing rust or other problems in the carburetor. Start by shaking off any excess water, then use a clean cloth that doesn’t shed lint to pat dry all of the parts. In case there are intricate sections that are hard to reach, having compressed air can be handy for forcing out trapped water.
Please remember that water can be beneficial to your components in moderate amounts, but excessive water can cause unwanted issues. Therefore, make sure to thoroughly dry your parts before reassembling your carburetor.
It is important to note that you should never use a heat gun or hairdryer to expedite the drying process. Direct heat can potentially distort or harm delicate carburetor components. It’s vital to exercise patience during this step of the process.
After thoroughly rinsing and drying each component, it’s essential to carefully inspect them for any lingering residue. Taking your time during the drying process is crucial, as attention to detail ensures a thorough cleaning before proceeding to the next step.
Tips and Tricks to Prevent Carburetor Build-Up
Taking care of your dirt bike carburetor goes beyond just the cleaning process. It involves preventive measures to prevent any buildup. Follow these tips and tricks to keep your carburetor clean and ensure optimal performance for your bike.
Use Quality Fuel and Oil
To begin with, it is important to use high-quality fuel and oil for your carburetor. Cheaper and low-quality options often contain impurities and contaminants that can lead to clogging of the carburetor’s jets and passages. By opting for quality fuel, you can ensure a cleaner system that lasts longer.
Regularly Drain the Carburetor
Regularly draining your carburetor is a great preventive measure. This simple trick ensures that fuel doesn’t sit in the carburetor’s bowls for too long, preventing the buildup of varnish or gum.
Proper Storage
If you’re planning to store your bike for an extended period, whether it’s weeks or months, it is recommended to empty your carburetor. Over time, gasoline can leave behind residues that harden and cause clogs. This is not a concern when the bike is regularly used since the fuel doesn’t stay long enough to evaporate and leave any residue.
Additives
You might want to consider using fuel additives as part of your maintenance routine. These helpful products can keep your fuel system clean and prevent blockages in the carburetor. I recommend following the recommendations provided in your user manual or by the additive manufacturers for optimal effectiveness.
Avoiding Ethanol Fuels
If you can, avoid using ethanol fuels. These types of fuels are known to attract moisture and cause corrosion in the fuel system. However, if you have no other option but to use them, it’s recommended to add a fuel stabilizer to minimize potential damage.
Cold Temperature Precautions
When the temperature drops, starting your dirt bike in cold conditions can result in fuel dilution in the oil. This can lead to sticky deposits forming in your carburetor. To avoid this issue, it’s important to warm up your bike before using it.
In conclusion, taking proactive measures to prevent issues can save you a significant amount of time, effort, and money on repairs and cleanings in the future. By consistently following these tips and giving your dirt bike carburetor regular attention and care, you can ensure it remains in excellent condition.
Common Mistakes to Avoid when Cleaning a Dirt Bike Carburetor
Properly cleaning a dirt bike carburetor is a meticulous task that demands careful attention to detail. Even the most devoted enthusiasts can unintentionally make errors that hinder their bike’s optimal performance. In this guide, we will highlight some of the most prevalent mistakes to avoid. By steering clear of these common pitfalls, you can ensure maximum efficiency and prolong the lifespan of your dirt bike.
- When disassembling the carburetor, it’s important to document each step. Taking pictures or notes can be incredibly helpful when it comes time to reassemble the small parts correctly. Avoid any confusion by systematically documenting the entire disassembly process.
- When it comes to maintaining a carburetor, it’s important to handle it with care. Avoid using abrasive cleaning materials that can scratch the surfaces and affect its performance.
- It’s important to give the cleaner enough time to work effectively. Grime and built-up dirt need time to loosen and dissolve. Being patient and allowing the cleaner to do its job will ensure that the carburetor gets thoroughly clean.
To ensure your dirt bike’s engine runs smoothly and efficiently, it’s important to avoid these common mistakes. Taking the time to understand the proper process and requirements for cleaning your carburetor will help extend its lifespan and maintain optimal performance.
The Benefits of Regular Carburetor Maintenance
Regular maintenance of your dirt bike carburetor provides significant benefits that enhance performance and ensure the longevity of your vehicle. Let’s explore some key advantages of regular carburetor maintenance.
Improved Fuel Efficiency: One of the advantages you’ll experience right away after a thorough cleaning is an enhanced fuel efficiency. When your bike’s carburetor has clogged jets and passages, it can lead to an improper fuel-air mixture, resulting in a noticeable decrease in gas mileage. Regular cleaning helps you save on fuel expenses.
Enhanced Performance: A clean carburetor is essential for maintaining a dirt bike’s optimal performance. It ensures a smooth and efficient fuel flow, resulting in quick throttle response, smoother rides, and improved acceleration. Additionally, a clean carburetor reduces the likelihood of stalling and idle-speed problems.
Keeping your carburetor well-maintained is crucial to prevent any significant damage. Regularly cleaning and servicing it helps prevent dirt and grime build-up, which can lead to expensive repairs or even the need for a complete carburetor replacement. By taking proactive measures and maintaining your carburetor regularly, you ensure its longevity and protect your dirt bike from unnecessary issues.
To ensure that your carburetor lasts longer, it is crucial to optimize its functionality. This involves maintaining all components, including jets, floats, and fuel passageways in their optimal condition. By doing so, you can prevent unnecessary wear and tear over time and enjoy a carburetor that serves you for an extended period.
Regular maintenance can actually save you money in the long run. Although it may initially seem like an unnecessary expense, investing in small-scale cleaning and upkeep efforts can help you avoid more expensive repairs or replacements later on. By keeping your carburetor running smoothly and efficiently, you’ll not only extend its lifespan but also ensure that your vehicle performs at its best. So, think of maintenance as a small investment with big benefits for your wallet and car’s longevity.
Frequently Asked Questions about Cleaning Carburetors
1. How often should I clean my dirt bike carburetor?
The recommended frequency of carburetor cleanings for dirt bikes can vary depending on usage and riding conditions. As a general guideline, it is typically sufficient to clean the carburetor once per season or after approximately 30 hours of ride time in order to maintain optimal performance.
If your dirt bike carburetor is exhibiting certain signs, it may be in need of a cleaning. These signs include difficulty starting the bike, uneven running, fuel leakage, or reduced fuel efficiency. Cleaning the carburetor can often resolve these issues.
3. Can I clean my carburetor without removing it from the bike?
Although technically feasible, it is generally recommended to remove the carburetor from your dirt bike for a more thorough cleaning. This approach ensures that all parts and passages are properly cleaned, resulting in a more effective outcome.
4. What cleaning solution should I use?
There are many cleaners available in the market that can effectively clean carburetors. It is recommended to use a cleaner specifically designed for carburetors as they are safe and efficient. Always follow the instructions provided by the manufacturer for best results.
5. Are there any risks to cleaning my carburetor?
Cleaning your carburetor carries minimal risks if you adhere to the correct procedure. The primary concern is misplacing small parts, so it’s crucial to keep track of all components during disassembly. Additionally, avoid leaving any parts soaking in cleaning solutions for an extended period to prevent potential damage.
6. Can a dirty carburetor damage my dirt bike?
Absolutely. A dirty carburetor can lead to a range of issues with your bike, such as decreased engine performance and lower fuel efficiency. In the worst-case scenario, it could even result in engine failure. To prevent these problems, it’s crucial to regularly maintain your carburetor.


19 thoughts on “How to clean a dirt bike carburetor?”