
For cycling enthusiasts, building your own BMX bike is a thrilling adventure. The opportunity to customize the bike according to your unique style and performance requirements brings a great sense of achievement. Moreover, it allows you to delve into the intricate workings of your two-wheeled companion, providing an intriguing learning experience.
According to an anonymous professional BMX rider, constructing a BMX bike provides riders with a distinctive viewpoint that enriches their cycling experience.
Every component of your BMX bike, from the frame to the rims, plays a crucial role in finding the perfect balance between style and performance. While building your bike from scratch may seem intimidating, the feeling of satisfaction when you take your newly constructed BMX for a ride is unmatched.
Now, let’s dive into the exciting process of building a BMX bike, step by step. With some enthusiasm and a little elbow grease, you’ll be well on your way!
- BMX Components Demystified: Discover the essential functions of each part on your BMX bike and understand why choosing the right component is vital for optimal performance.
- Choosing the Right Parts: To ensure optimal performance and functionality of your bike, it’s crucial to have a good understanding of how to select parts that not only complement each other but also align with your specific cycling style.
- Putting Together Your BMX Bike: With the right knowledge and all the necessary components in hand, we’ll walk you through the step-by-step assembly process. Selecting the Perfect Frame: Considering Size, Material, and Geometry
The time has come to begin your BMX bike-building adventure. But, before you dive in, there’s a crucial decision to make – selecting the perfect frame. The frame serves as the backbone and forms the foundation for everything else on your bike. Therefore, it’s vital to choose wisely, as the right frame is essential for your dream bike.
Size Matters
The size of the frame is also important when it comes to choosing the right one for your needs. It should be a good match for both your physical dimensions and riding style. If a BMX frame is too large, it can be challenging to control, while a frame that is too small may affect your comfort and ability to perform tricks. To avoid any issues, take into consideration your height and riding preferences when selecting the appropriate frame size.
Material Selection
Now let’s discuss the frame material and its impact on weight, strength, and durability. Aluminum frames, for instance, are lightweight, enhancing the bike’s agility and handling. Conversely, chromoly frames are heavier but provide better shock absorption and increased durability. Additionally, carbon fiber and titanium frames offer specific advantages and considerations that contribute to finding the right balance between performance and cost.
Geometry is Key
One important consideration that beginner builders often neglect is frame geometry. The angles, lengths of the tubes, and other aspects of the frame’s geometry have a significant impact on your bike’s performance, including its handling, ride quality, stability, and abilities in jumping or cornering. In essence, frame geometry determines how your bike will respond to various riding situations. While this may sound technical at first, it will become clear once you hop on your custom-built BMX.
Each individual rider has their unique style, and it’s important to build a bike that enhances that. Choosing the right frame, therefore, becomes a paramount step, setting the tone for the exciting journey of bike construction. It’s all about tailoring components to your specific needs to make a BMX bike that’s truly one of a kind.
The Art of Wheel Building: Selecting the Perfect Rims and Spokes
Constructing wheels for a BMX bike is a meticulous endeavor that demands careful attention to detail. The primary objective is to strike the right equilibrium between strength, weight, and performance. Achieving this balance hinges on two crucial elements: the selection of appropriate rims and spokes.
Choosing Your BMX Rims
The rim of a BMX bike is not just a simple component that holds the tire. It plays a significant role in determining the bike’s handling, acceleration, and braking performance. That’s why it is essential to make an informed decision when choosing a rim for your BMX bike.
- BMX rims are mainly constructed from aluminum because of its lightweight and strength. However, the quality of the aluminum can vary, impacting both durability and weight. Some high-end rims utilize a double-wall design to provide additional toughness.
- Choosing the right size rim is important for BMX bikes. The most common size for these rims is 20 inches in diameter, but there are also options available in 16, 18, and 24 inches. These alternate sizes are typically used for junior or specialized BMX bikes.
- When it comes to rim width, wider rims offer improved stability and a larger contact area for the tire. This can potentially enhance grip while riding. It’s important to note, however, that wider rims are heavier and may not be suitable for all riding styles.
Selecting BMX Spokes
Spokes play a crucial role in a wheel’s performance. They transfer the rider’s power to the ground and also absorb impacts from uneven terrain. Therefore, the number, thickness, and material of spokes have a significant impact on how the wheel performs.
- The most commonly used material for spokes is stainless steel because it offers both strength and resistance to rust. In some high-performance wheels, butted spokes are employed. These spokes are thinner in the middle and thicker at the ends, which helps reduce weight while maintaining strength.
- When it comes to the number of spokes, BMX wheels typically feature 36. Adding more than that would only increase the weight unnecessarily, while having fewer spokes could potentially compromise the wheel’s structural integrity.
- Spoke tension is a critical factor in ensuring the longevity and performance of a wheel. Uneven or incorrect spoke tension can lead to premature failure. By properly tensioning spokes, the wheel becomes stronger and more durable.
Choosing the perfect combination of rims and spokes for your BMX bike requires a thorough understanding of how you’ll be using it. What works well for dirt jumping may not be optimal for street riding. It’s essential to consider your specific needs when building your wheels. Ultimately, the most satisfying performance is achieved when wheels are designed with purpose, foresight, and specialized knowledge.
Selecting the Ideal Handlebars and Grips for Ultimate Control
To become proficient in the art of BMX riding, it is essential to have a strong grasp on manipulating the handlebars and maintaining a firm grip. These two components serve as your control panel when tearing through dirt tracks, executing daring tricks, or maneuvering through bustling urban streets. It is of utmost importance to carefully choose handlebars and grips that seamlessly align with your specific riding requirements and personal preferences.
Handlebar 101: Material, Style, and Rise
There are various types of BMX handlebars designed to accommodate different riding styles. They are typically constructed using Chromoly or Aluminium materials. Chromoly offers a good balance between weight and durability, but it comes at a higher cost. On the other hand, Aluminium is lighter in weight and more budget-friendly, although it may not be as long-lasting. It’s important to carefully consider these trade-offs before making an investment in your BMX bike.
The height of the handlebar, known as the “rise,” is another important factor to consider. This refers to the distance from the bottom of the handlebar to its highest point and can vary from 2 to 10 inches depending on the rider’s height and preference. A higher rise can offer greater control during stunts but may slightly affect riding speed.
The Balancing Act: Width and Upsweep
Many cyclists tend to overlook the importance of handlebar dimensions, such as the angle known as ‘upsweep’ and the distance between the bar ends called ‘width’. The width of a handlebar directly affects stability at high speeds and during landings, making wider bars ideal for off-road biking and racing. On the other hand, narrower bars provide enhanced maneuverability and are preferred by freestyle and street BMX riders.
The Perfect Grip: Material, Length, and Pattern
When it comes to riding a BMX bike, having the right grip is crucial. It’s not just about keeping your hands in place; it’s also about minimizing vibrations, preventing fatigue, and maintaining control. That’s why many riders opt for grips made from softer compounds. They offer greater comfort and better shock absorption, although they may not last as long. On the other hand, harder compounds provide durability but may be less comfortable for some riders.
The length of a grip is a matter of personal preference and can range from around 140mm for regular grips to over 150mm for longer versions. Grip patterns also vary, with options like waffle, mushroom, or knurled designs. Each pattern offers unique advantages: waffle patterns provide excellent traction in wet conditions, mushrooms offer superior shock absorption, and knurled designs ensure a non-slip grip regardless of hand sweat or weather conditions.
In summary, selecting the right handlebars and grips for your BMX bike is crucial for achieving control and precision. It’s important to prioritize your personal comfort and riding style when choosing the perfect options for you. Let your own preferences be your guide in making the final decision.
Picking the Perfect Forks and Suspension for a Smooth Ride
BMX bikes are off-road sport bicycles used for racing and stunt riding. To ensure safe and smooth performance, it’s crucial to choose the right forks and suspension. Let’s explore the options available for these essential components.
Forks: Material and Style Considerations
Choosing the right forks for your BMX is essential for optimal steering. There are various materials and styles available, each offering unique benefits to enhance your ride. Two popular options you may encounter are chromoly and carbon fiber forks. Chromoly forks, crafted from a robust steel alloy, are perfect if you enjoy performing stunts and jumps. Alternatively, carbon fiber forks are lighter but less durable, making them ideal for racing BMX bikes where speed is of utmost importance.
Suspension Forks: A Unique Element in the BMX World
BMX bikes are usually designed without a suspension system because they prioritize speed, agility, and trick performance. However, some riding styles and off-road situations may benefit from suspension forks. These forks are made of the same materials as non-suspension ones but come with a built-in shock absorption mechanism that provides a smoother ride over rough terrain. They enhance control and reduce rider fatigue, giving you an advantage when you’re on long rides or tackling challenging trails.
Integrating Forks and Suspension For Your Riding Style
The choice of forks and suspension for your BMX bike depends on your specific riding style. If you’re into racing, you might prioritize lightweight efficiency and opt for carbon fiber forks without suspension. However, if you’re more into stunt riding or off-roading, you may prefer the durability of chromoly forks with a suspension system to add comfort. It’s important to consider the trade-offs in terms of weight, durability, and control when making this decision. Embrace this opportunity to customize your BMX bike according to your unique riding style because as they say, it’s not the ride that shapes the rider; it’s the rider that shapes the ride.
Choosing the Right Cranks and Pedals for Optimal Power Transfer
The Foundation: Selecting BMX Cranks
The cranks on your BMX bike are crucial for transferring the power you generate to the bike. Therefore, it’s important to choose the right ones. One key consideration is the crank length. Shorter cranks offer benefits in terms of ground clearance and agility, while longer cranks enhance power transfer, albeit with potential maneuverability challenges.
The material of your cranks is also important. Chromoly steel cranks are a good choice for BMX bikes because they offer a balance between strength and weight. They are also reasonably priced. On the other hand, aluminum cranks are lighter but may not be as durable for aggressive BMX riding compared to steel cranks.
Perfecting Power Transfer: Picking the Right Pedals
Once the bike frame and cranks are in place, the next step is to choose the ideal pedals for optimal power transfer. Pedal selection focuses on factors such as material, surface area, and grip.
Pedals come in a variety of materials, with the primary ones being plastic and metal. Plastic pedals are lightweight and affordable, making them a popular choice for beginners. However, they tend not to offer as much durability as their metal counterparts. Metal pedals, typically aluminium, are pricier but provide superior grip and tend to last longer.
When it comes to surface area, larger pedals offer a more comfortable and powerful platform for your feet. On the other hand, smaller pedals are lighter and less bulky, making them popular among freestyle and street riders.
Grip is crucial for maximizing power transfer and ensuring safety while riding. Pedals that have more pins and rougher surfaces offer better grip, keeping your feet securely in place during your ride.
The transfer of power from the rider to the bike primarily occurs at the cranks and pedals. Therefore, selecting the appropriate ones can significantly impact your riding experience.
Selecting the Right Headset and Stem for Steering Precision
Choosing the right headset and stem is crucial for maintaining precise control and steering in your BMX rides. The headset acts as a bridge between your bike’s frame and fork, allowing smooth rotation of the front end. On the other hand, the stem connects the handlebars to the bike, playing a pivotal role in the overall steering mechanism.
Starting with a Suitable Headset
When selecting a headset, there are two important factors to consider: the type and the material. In terms of type, you have the option of integrated or non-integrated headsets. Integrated headsets are typically found in modern BMX bikes because they are directly installed into the frame, resulting in a clean and seamless appearance.
Alternatively, a non-integrated headset requires a cup to be pressed into the frame. Both options function effectively, and the choice often depends on personal preference and frame compatibility.
Most BMX headsets are typically made of aluminum, which strikes a balance between weight and durability. The bearings housed within the headset can be either steel or ceramic. Ceramic bearings, although pricier, provide superior performance due to their lower friction and increased durability.
Choosing the Ideal Stem
When it comes to BMX stems, there are several factors to consider, such as the type, reach, and rise. There are two main types of stems: frontload and topload. Frontload stems have been traditionally popular in BMX because they position the handlebars lower, which provides stability. However, some riders may find themselves stooping with this type of stem.
On the other hand, topload stems are designed to position the handlebars higher, allowing for easier body placement and smoother transfers. Ultimately, it’s about discovering what feels most comfortable and suitable for your needs.
The length of the stem, which is the distance from the center of the stem to the center of the handlebars, impacts how quickly and easily you can steer. Meanwhile, the rise determines the height of your bars compared to your fork’s top tube.
The construction and hardware of the stem are essential and typically involve a combination of steel and aluminum. It’s important to ensure that all parts are built to withstand the demands of BMX riding.
You might also want to consider using flexible stems, as they can provide useful shock absorption for more challenging rides.
One final important point to consider is that the decisions you make when selecting your headset and stem for your bike will have a significant impact on its overall handling. It’s crucial to find the perfect balance between comfort, control, and performance in order to enhance your riding experience.
Optimizing the BMX Bike’s Performance with Tires and Tubes
Choosing the right tires and tubes for your BMX bike is essential to improve performance and ensure a smooth ride. Besides considering the size, there are other important factors to pay attention to, such as tire tread pattern, hardness, width, and whether to use tubed or tubeless systems. By understanding and integrating these factors effectively, you can enhance your riding experience significantly.
Tire Tread Pattern: Gripping Attention
The design of the tread on BMX tires is crucial for optimizing your bike’s performance. Each tread pattern, whether it’s a knobby tire with aggressive knobs or a smoother street-focused tire, offers varying levels of grip, rolling resistance, and control. Knobby tires are great for navigating loose and muddy terrain while street tires with their smooth tread excel on pavements and skate parks. Therefore, it’s important to choose the right tire that suits the specific terrain you’ll be riding on.
The Right Hardness and Width: Playing a Balancing Act
The performance of tires is influenced by their hardness and width. Tire hardness is measured using the ‘Shore A Durometer’ scale. Higher shore numbers indicate harder tires, which are generally faster but may have less grip. Conversely, softer tires offer better grip at the expense of some speed. In terms of width, wider tires provide enhanced shock absorption and stability, while narrower options prioritize agility and speed.
Considering Tubes: The Air That Carries You
When it comes to BMX riding, the decision between tubed and tubeless tires holds great significance. Tubed tires are the conventional choice and offer easy replacements by simply installing a new tube in case of a puncture. On the other hand, tubeless tires require a bit more effort to seal but provide benefits like reduced weight and enhanced resistance against punctures. This advantage can be particularly valuable for riders navigating rough and rocky terrains or participating in competitive tracks.
In conclusion, it’s just as crucial to pay attention to your tires and tubes as it is to select the ideal frame, handlebars, or rims for your BMX bike. These choices collectively determine the personalized dynamics of your bike. That’s why before making a decision, take into account your riding style, the terrain you’ll be tackling, and your bike’s specific needs. After all, these components are what separate you from the ground and can make the difference between an impressive leap and a rough fall.
Building the Perfect BMX Bike: Step-by-Step Assembly Guide
Once you have chosen all the components for your perfect BMX bike, there’s still one exciting part left: assembling it. This process is not only enjoyable but also rewarding. So, are you ready to start building your impressive set of wheels? Let’s bring together those meticulously selected parts and create something extraordinary.
Prepare Your Workspace
To ensure a smooth and efficient bike assembly process, it’s important to set up a clean and spacious workspace. Make sure you have enough room for all the bike components and the necessary tools. While not essential, using a stand to hold your bike frame during assembly can greatly simplify the task.
Install the Bottom Bracket and Cranks
To begin, start by installing the bottom bracket into the frame, making sure to apply grease for smooth operation. Once that’s done, you can proceed to attach the crank arms. Since the cranks serve as important connection points between your body and the bike, it’s essential to securely fasten them. Remember, a stable crank ensures optimal power transfer to your BMX bike.
Mount the Forks and Headset
Now, you’ll want to carefully insert your selected fork into the head tube of the frame, ensuring that the necessary bearings are in place. The headset is what connects these components and allows for smooth steering. Once the fork is inserted, you can install the stem on top of the headset. Be sure to tighten it enough to eliminate any play but still allow for smooth rotation.
Attach the Handlebars
Now it’s time to attach the handlebars to the stem. The process itself is pretty straightforward, but getting the angles just right can be a bit tricky. Make sure there is an equal amount of space at the top and bottom of the stem. As for the angle of the handlebar, that will depend on your personal preference. Just keep in mind that finding the perfect angle will greatly improve control and comfort while riding.
Install the Wheels
Place the wheel into the slots on the fork dropouts. If necessary, use washers to secure them on both sides. Ensure that the wheels are centered and not rubbing against any part of the frame or fork.
Set Up the Seat and Seat Post
Next, let’s install the seat post and seat. Insert the seat post into the frame and adjust it to your desired height. Once adjusted, tighten it securely in place. Double-check that the seat alignment is correct to ensure a comfortable ride.
Fix the Pedals
Now, screw your pedals into the crankarms. Keep in mind that the left pedal is reverse threaded (it tightens counter-clockwise), while the right pedal is regular (it tightens clockwise). Remember, the pedals directly contribute to generating power for your BMX bike, so make sure they are securely tightened.
Install Brakes
If your BMX bike has brakes, make sure to follow the manufacturer’s manual for proper installation. Take the time to adjust and test them to ensure they are functioning correctly before you start riding.
Congratulations on completing your professional-grade BMX bike! It’s not only a thrilling ride, but also a source of pride knowing that you built it with your own hands. Just keep in mind that a BMX bike is more than just a display piece – it’s a high-quality sports equipment that promises endless hours of fun and excitement. Enjoy your rides!
The Thrill of BMX: Exploring Different Riding Styles and Disciplines
BMX biking is more than just having the right bike – it’s about how you ride. There are various disciplines and styles within BMX, each offering a unique thrill and requiring a specialized approach. Understanding these different styles will not only enhance your enjoyment of the sport but also guide you in making informed decisions when it comes to building your bike.
BMX Racing
BMX racing is easily the most iconic variation of BMX. It entails high speeds, meticulous precision, and audacious tricks on purpose-built off-road tracks designed for a single-lap race. Riders go head-to-head against each other, often executing impressive jumps and navigating difficult corners with skill and agility. When constructing a bike specifically for BMX racing, it’s essential to prioritize lightweight materials, durable construction, and optimal power transfer to ensure peak performance.
Freestyle BMX
Freestyle BMX involves the art of performing tricks in various settings, such as parks or streets. This style can be further categorized into vert (ramp riding), park (tricks using man-made features), street (utilizing urban environments), flatland (tricks on a flat surface), and dirt (airborne tricks on dirt jumps). As a result, freestyle BMX bikes are designed with sturdier construction, prioritizing rotational freedom and shock absorption.
Dirt Jumping
Dirt jumping in BMX is a discipline that focuses on launching off dirt hills and making big jumps. Unlike freestyle BMX, which involves performing tricks, dirt jumping requires a bike that is lightweight, sturdy, and built for high-flying action. It needs to be able to withstand heavy landings and keep going strong.
BMX Street
In BMX Street, riders utilize the urban environment, using features like staircases and handrails to execute tricks. Street bikes are specifically designed with a sturdier build and stronger wheels to withstand the high-impact nature of this challenging discipline.
Whether you’re seeking the rush of adrenaline from racing, the satisfaction of executing a complex trick, or simply experiencing pure joy while catching air off a dirt jump, BMX offers something for everyone. It’s important to keep in mind that each discipline within BMX requires a specific type of bike. Customizing your bike to suit your preferred discipline is crucial in ensuring you can achieve the thrill and excitement you desire.
FAQS
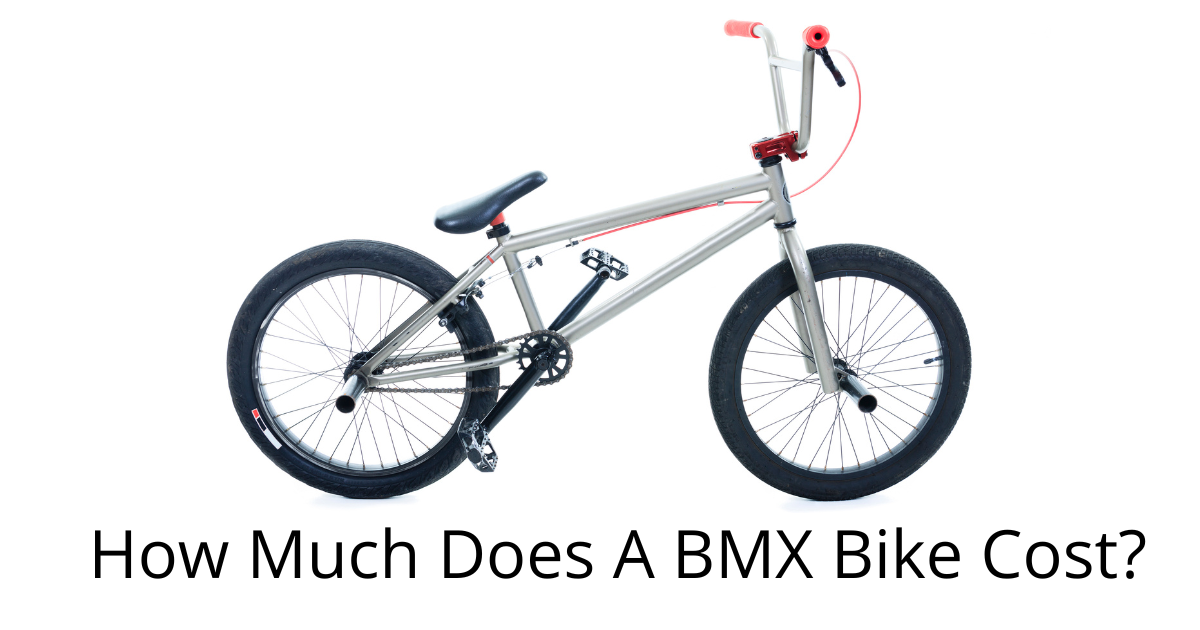
How much does it cost to build a BMX?
The cost of building a BMX bike from the ground up depends entirely on the parts and components you choose. An entry-level BMX build can cost around $200 to $500, while a high-end custom build with premium parts might set you back $1000 or more. It’s more or less about balancing your desires with your budget.
What tools do I need to build a BMX bike?
Building a bike is a hands-on process that requires the assistance of reliable tools. Some essential tools include Allen keys, a pedal wrench, a bottom bracket tool, a chain tool, a spoke wrench, and tire levers. While not mandatory, having a bike stand can also be useful.
Is it difficult to build a BMX bike from scratch?
Constructing a BMX bike from the ground up can be quite daunting, particularly for those new to the endeavor. However, do not let this discourage you. The entire process is not only captivating but also gratifying, offering a profound sense of fulfillment. Plus, with every component you assemble, you gain valuable insights into your bike and its mechanics. So, embrace the challenge wholeheartedly!
Can I customize the colors and graphics on my BMX bike?
Definitely! One of the great things about building your own BMX bike is that you have complete control over the colors and design of every component. From the frame to the spokes, you can choose exactly how you want your bike to look. You can even add customized graphics or decals to give it a unique and personal touch. Just remember to make any modifications in a way that doesn’t compromise the structural integrity of the bike.
How long does it take to build a BMX bike?
The time it takes to build your BMX bike can vary depending on your experience and the complexity of the build. If you’re new to this, it might take a few days up to a week. It’s important to remember that patience and attention to detail are crucial in this process. It’s not about rushing through it, but rather enjoying the labor of love involved in building your bike.
Can I use old bike parts to build a BMX bike?
Absolutely! Building a BMX bike using recycled bike parts is not only cost-effective but also environmentally conscious. It’s important to make sure that the used parts are in good condition and appropriate for the style of bike you want to build. However, there are certain components like the frame or wheels where investing in new ones would be beneficial to ensure optimal performance and safety.
Do I need any special skills or knowledge to build a BMX bike?
RephraseWhile it’s beneficial to have a basic understanding of bikes and their mechanics, you don’t need to be an expert. All you need is a willingness to learn, a bit of patience, and some practical dexterity. Luckily, there are numerous online resources and tutorials available that provide detailed guidance for each step. So why wait? Dive in and get started!


One thought on “How to build a BMX bike?”