
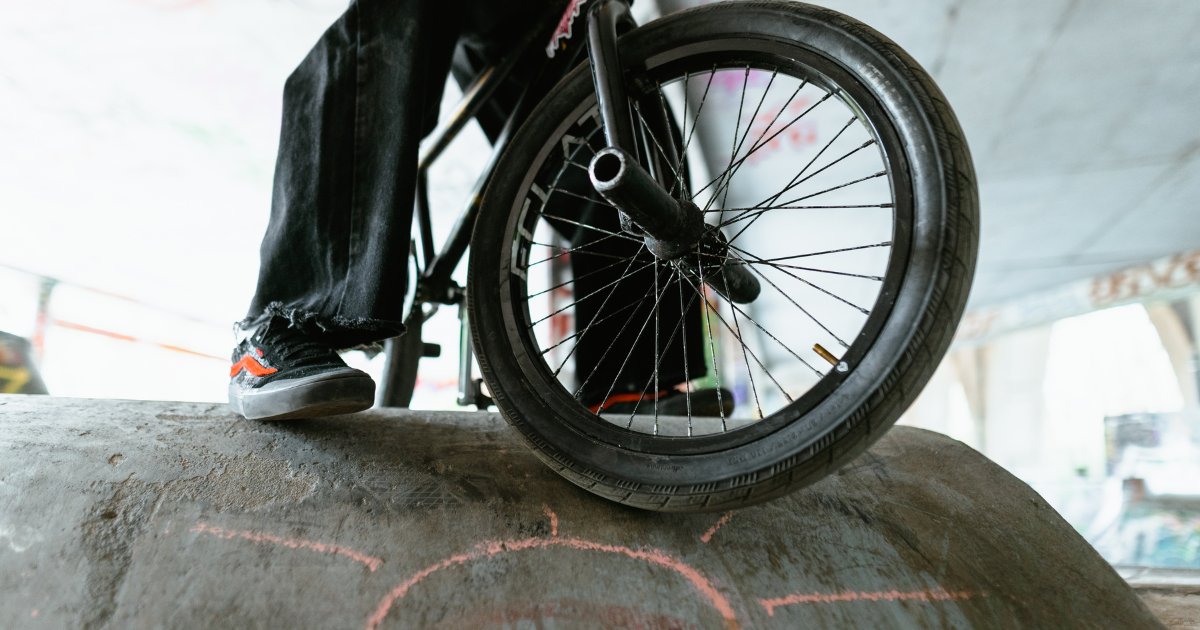
Attention BMX riders! If you want to maximize your performance on the track or at the skate park, don’t overlook one crucial factor: the tightness of your BMX chain. It may seem like a small detail, but trust us, it can make all the difference.
In this blog post, we’ll cover everything you need to know about achieving the ideal chain tension for your ride. From measuring and adjusting chain tightness to knowing when it’s time for a replacement, we’ve got you covered. So grab your bike and get ready to pedal with power and precision as we dive into this informative guide. Let’s roll!
The Different Types of Chains
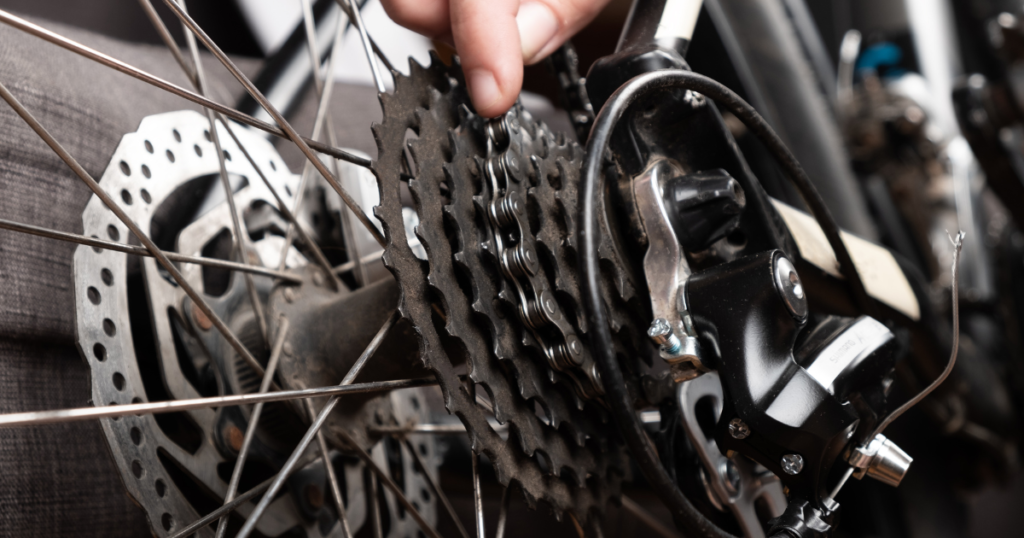
When it comes to BMX bikes, there are several different types of chains that you may encounter. One of the most common types is the standard 1/8″ chain, which is renowned for its durability and strength. This particular type of chain is frequently utilized in both BMX racing and freestyle riding activities.
Another type of chain you may encounter is the half-link chain. As the name suggests, this chain consists of alternating links that are either full size or half size. Half-link chains offer more adjustability when it comes to tightening your bike’s tension, making them popular among riders who want precise control over their setup.
For those seeking a lighter and higher-performance option, a hollow pin chain may be worth considering. These chains feature hollow pins that effectively reduce weight while maintaining strength. Hollow pin chains are a popular choice among professional riders who prioritize speed and agility, particularly on the track.
You can also find colored chains to add some flair to your ride. These chains come in vibrant colors like red, blue, green, and even rainbow patterns! Although they don’t directly affect performance, they can add a stylish touch to your bike.
No matter what type of chain you choose for your BMX bike, it’s important to ensure that it fits properly and is compatible with your drivetrain components. Now that we’ve covered the different types of chains available let’s move on to measuring your chain length accurately.
Measuring Your Chain Length
Measuring the chain length of your BMX bike is essential for optimal performance and efficiency. Luckily, this process is straightforward and only requires a few basic tools.
To measure the length of a chain, you will need a ruler or tape measure. Begin by placing one end of the ruler or tape measure at one of the chain’s pins. Then, extend it along the entire length of the chain until you reach another pin. Take note of the measurement.
Before moving on, it’s important to inspect your bike for any extra tensioners or eccentric bottom brackets that could impact the chain length. If you find any, make the necessary adjustments accordingly.
Keep in mind that the ideal chain length for a BMX bike may vary slightly depending on factors like frame size and crank arm length. As a general rule, aim to have about 1/2 inch (12mm) of slack in your fully extended chain.
To ensure smoother rides and reduce wear on other drivetrain components like gears and sprockets, it’s important to accurately measure and adjust the length of your BMX bike’s chain. Taking the time to get this step right will make a noticeable difference in your riding experience. Your bike will be grateful for it!
How To Measure BMX Bike Chain Tension (Step by Step)?
Checking the tension of your BMX bike chain is crucial for maintaining performance and ensuring its longevity. To accurately measure the chain tension, follow these simple steps:
1. Begin by shifting your bike to the smallest front chain ring and rear cog.
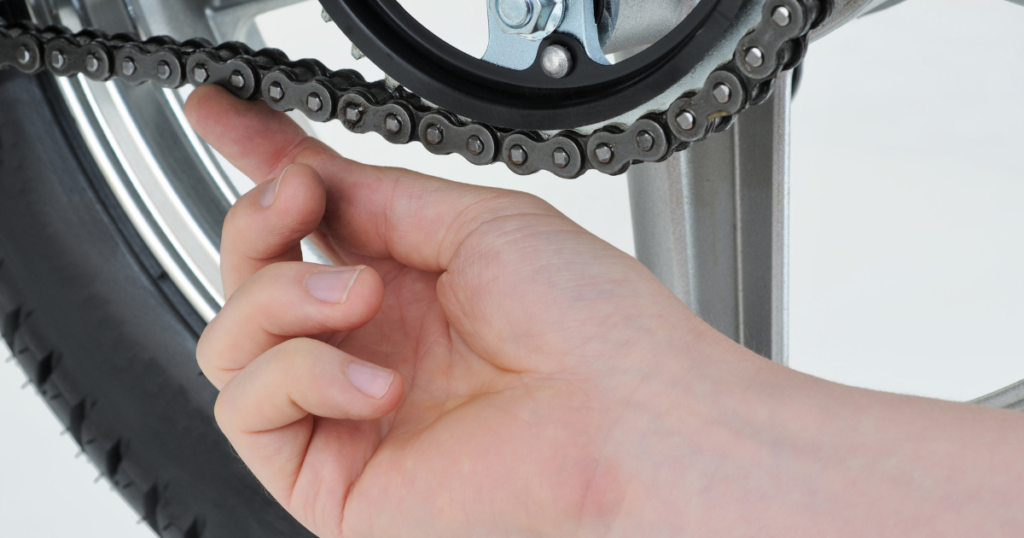
2. Locate the midpoint between the two wheels on the bottom part of the chain.
3. Apply light pressure with your hand or a tool to lift the chain slightly off of its resting position.
4. Measure how much you can lift the chain using a ruler or tape measure.
5. Ideally, there should be approximately 0.5–1 inch (or 12–25 mm) of slack in a properly tensioned BMX chain.
Regularly checking the tension of your BMX bike’s chain has several benefits. It helps to maintain proper shifting, prevents unnecessary wear on your bike’s components, and reduces noise while riding.
Be sure to inspect for any areas of resistance or limited movement while measuring, as these could signify problems with worn-out parts or inadequate upkeep.
Proper tension maintenance not only improves overall performance but also increases the longevity of your bike’s drivetrain and sprocket system.
Keeping tabs on this crucial aspect will undoubtedly lead to smoother rides filled with exhilarating tricks and stunts!
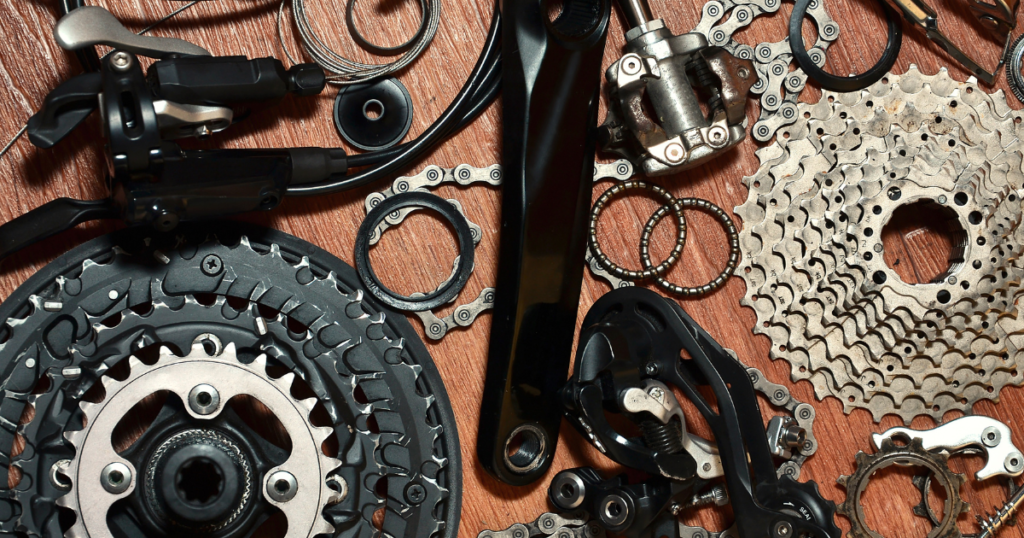
Tools for Bike Chain Tightening
When it comes to tightening your BMX bike chain, having the right tools can make all the difference. Here are a few essential tools you’ll need:
1. Chain Tool:
A chain tool is an essential tool for cyclists. It enables you to easily adjust the length and tension of your bike chain by removing and installing pins.
2. Allen Wrenches:
You can find these convenient tools in different sizes, and they are specifically designed for tightening or loosening bolts on your bike. This includes the ones that keep your rear wheel securely in place.
3. Pliers:
Using pliers is helpful for gripping and pulling the chain when making adjustments. They are also useful for removing or installing quick links.
4. Chain Gauge:
Regularly monitoring the condition of your bike chain is essential to prevent excessive wear and potential damage. This tool helps measure the stretch of your chain over time, allowing you to assess its wear accurately.
5. Lubricant:
Necessary for maintaining a smooth-running BMX chain and reducing friction between moving parts, lubricant is an essential component.
By having these tools easily accessible, you can effectively tighten and maintain the chain on your BMX bike whenever needed.
Bike chain tightening by gear type
When it comes to tightening your BMX bike chain, the gear type you have can play a role in determining how tight it should be. Different gear types may require different levels of tension to ensure optimal performance and prevent damage.
Tightening the chain on a single-speed bike is a simple process. First, loosen the rear wheel nuts or quick-release skewer to create slack in the chain. Then, slightly move the rear wheel forward until you reach the desired tension. It’s important not to tighten it too much, as this can strain both your chain and drivetrain components unnecessarily.
If your BMX bike has multiple gears, like a cassette or freewheel, tightening the chain requires a bit more attention. You need to strike a balance between having enough tension for seamless gear shifting and avoiding excessive wear and stress on your derailleur.
To properly tighten the chain on a multi-gear BMX bike, begin by shifting to one of the smaller cogs on your cassette or freewheel. Then, use an Allen key or wrench to loosen and adjust the rear derailleur barrel adjuster. Ensure that the chain has enough tension while still allowing for easy shifting throughout all gears.
Ensuring your BMX bike’s chain is properly tensioned is essential for maintaining its performance and longevity. If you’re uncertain about the correct tightness for your specific gear type, it’s advisable to seek assistance from a professional mechanic.
How to tighten your BMX chain?
Tightening your BMX chain is an essential maintenance task that every rider should know how to do. A loose chain can cause poor performance and even damage to your bike, so it’s important to keep it properly tensioned.
Before you start, gather a couple of essential tools. Grab a 15mm wrench or socket to easily loosen and tighten the axle nuts on your rear wheel. Additionally, have a chain tool handy in case you need to break the chain.
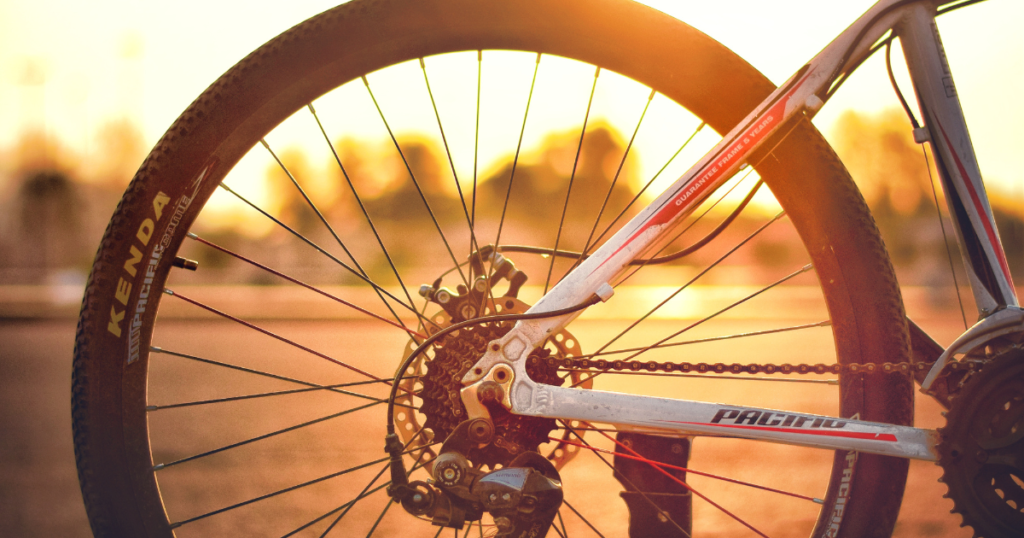
Start by loosening the axle nuts on both sides of the rear wheel. This will allow you to adjust the position of the wheel and tighten or loosen the chain as needed. Once loosened, move the wheel forward or backward in order to achieve proper tension.
To check if your chain is adequately tightened, apply downward pressure on it at the midpoint between the front and rear sprockets. It should have a slight amount of slack or looseness. Ideally, you should be able to move it about half an inch in either direction.
After achieving the desired tension, securely retighten both axle nuts using a 15mm wrench or socket. It is crucial to tighten them enough to prevent loosening during riding but not excessively tight, as this can strain other components of your bike.
It’s important to keep in mind that regular checks and adjustments may be necessary for your BMX chain. Over time, chains can stretch due to use and wear. By maintaining proper tension, you’ll ensure optimal performance while minimizing any potential issues while riding.
When to replace your BMX chain?
When it comes to your BMX chain, knowing when to replace it is crucial for maintaining optimal performance. While chains are designed to be durable and withstand a lot of wear and tear, they do have a limited lifespan.
A clear sign that it’s time to replace your BMX chain is if it has excessive stretching. As the chain ages, its links can become worn out and elongated, resulting in a sagging or teeth-skipping effect on the sprockets. This can lead to poor shifting performance and, more importantly, potential accidents if not dealt with promptly.
One indication that your BMX chain requires replacement is if you observe noticeable damage or wear on the individual links. Keep an eye out for any bent or twisted links, as well as signs of rust or corrosion. These problems can weaken and compromise the strength of the chain, increasing the risk of it breaking while riding.
If you notice that your gear shifting requires frequent adjustments because it’s not performing consistently, it could mean that your BMX chain has reached its limit. A worn-out chain can cause the gears to become misaligned and result in imprecise shifting.
Regular maintenance and cleaning can help prolong the life of your BMX chain but eventually, replacement will be necessary. Keep an eye out for these signs so you can ensure smooth rides and prevent any unwanted mishaps while shredding on your bike!
What to Do When Your BMX Chain Is Loose?
A loose BMX chain can impact both the performance and safety of your ride. Fortunately, there are steps you can take to resolve this problem.
To properly tighten your chain, you’ll need a few tools. An adjustable wrench or a chain tool will be useful for loosening or removing links as necessary. It’s also a good idea to have a rag nearby to clean any dirt or debris from the chain.
To begin, find the master link on your chain. It will typically look different from the other links. Use a pair of pliers or your fingers (if possible) to temporarily remove this link.
To determine the proper tension for your chain, gently pull on it at the midpoint between the front and rear sprockets. The ideal amount of vertical play should be around half an inch or 12-15mm.
If you need to make any adjustments, use an adjustable wrench or the appropriate tool to turn the axle nuts on both sides of the rear wheel clockwise until you reach the desired tension. It’s important not to overtighten them as this can cause excessive wear and possible damage.
After tightening, reattach and secure the master link properly before testing out your newly adjusted BMX chain.
Remember that regular maintenance like cleaning and lubricating can prevent chains from becoming loose in the first place. So keep an eye on your bike’s condition and give it some TLC when needed!
When dealing with a loose BMX chain:
1) Gather necessary tools
2) Locate master link
3) Assess tension required
4) Adjust rear wheel axle nuts accordingly
5) Reattach and secure master link correctly
By following these steps, you’ll ensure that your BMX rides smoothly without any issues caused by a loose chain!
What Happens If Your BMX Bike Chain Is Tight?
When your BMX bike chain is too tight, it can cause various issues that may affect your riding experience. One of the most common problems is increased wear and tear on both the chain itself and other components of your bike. A tight chain puts excessive stress on the drivetrain, including the sprockets and gears, leading to faster deterioration.
Moreover, a tightly tensioned chain can create excess resistance as it moves through the drivetrain, causing decreased efficiency and power transfer. This can make it more challenging to pedal smoothly or achieve optimal speed.
Additionally, a chain that is overly tightened increases the likelihood of it snapping or breaking while riding. When you encounter jumps or execute tricks, any sudden force exerted on a chain that is already under excessive tension can result in potentially disastrous consequences.
Using a tight BMX bike chain can cause discomfort and potentially harm your joints. The increased tension adds resistance while pedaling, which can strain your knees and hips in the long run.
To prevent these problems and ensure a seamless ride, it is crucial to regularly check the tension of your BMX bike’s chain and make any necessary adjustments. Keep in mind that finding the perfect balance between being too loose or too tight will help extend the lifespan of both your chain and other important components.
Conclusion
The tightness of your BMX chain is crucial for optimal performance and safety. Throughout this article, we have explored the different types of chains, how to measure chain tension, tools for tightening your bike chain, and when to replace it.
To have a smoother ride and avoid future problems, it is important to understand the significance of maintaining proper chain tension and regularly inspecting its condition. The choice between a looser or tighter chain mainly depends on personal preference and riding style. Taking these steps will help ensure an optimal cycling experience.
It is important to remember that if your BMX chain is loose, it can result in reduced power transfer and a higher chance of derailing. Conversely, an excessively tight chain can place excessive strain on your drivetrain components.
To tighten your BMX chain correctly, follow our step-by-step guide using either a gear or adjustable dropouts system. Always refer to your bike’s manufacturer’s guidelines for specific instructions.
In case you notice signs of wear such as stretched links or skipping gears despite proper tensioning, it may be time to replace your BMX chain altogether. Regular maintenance will help prolong the lifespan of both your bicycle’s components and enhance overall performance.
Remember, keeping your bike’s chain clean and lubricated on a regular basis is also crucial for ensuring its long-term durability.
FAQs:
Q: Can I use any lubricants on my BMX chains?
A: No! It is crucial to use lubricants specifically designed for bicycle chains as other substances may cause damage
1. How tight should a BMX chain be?
The ideal tension for a BMX chain is when it has just enough slack to move up and down about half an inch without being too loose or too tight. It should have some flexibility but not so much that it risks coming off the sprocket or causing unnecessary wear on the drivetrain.
2. How do I measure my chain length?
To determine your BMX bike’s chain length, you can count the number of links in your current chain or measure from one end of the roller to another, excluding any master links.
3. What tools do I need for tightening my bike chain?
You will need a 15mm wrench and possibly a chain breaker tool if you need to remove any links from your existing chain.
4. Can I tighten my BMX bike’s chain based on its gear type?
Yes, different gear types may require slightly different tension levels. For single-speed bikes, aim for approximately half an inch of vertical movement in the middle section of your lower rung when applying downward pressure with your fingers. For multi-speed bikes (with derailleur gears), shift into the smallest front and rear gears before adjusting tension.
5. When should I replace my BMX bike’s chain?
It is recommended to replace your BMX bike’s chains every 1,000-2,500 miles depending on use and maintenance routine. If you notice significant stretch or wear patterns on the teeth of either the front crankset or rear cassette/freewheel, it might be time for a new replacement.
6. What should I do if my BMX bike’s chain becomes loose while riding?
If you feel a sudden looseness while riding, it could be due to a stretched or damaged link in your drivetrain system. It’s important to stop immediately and inspect the entire system for any damage before attempting any repairs.
7. What happens if my BMX bike’s chain is too tight?
An overly tight BMX chain can put unnecessary stress on your drivetrain components, leading to accelerated wear


2 thoughts on “How Tight Should A BMX Chain Be?”