
In this blog, we will walk you through 10 essential steps to change a tire on a dirt bike like a pro. Whether you’re an experienced rider or just starting out, our comprehensive guide will provide you with the knowledge and skills to confidently handle any flat tire situation. From gathering the necessary tools to mastering the proper technique, we cover it all. Get ready to unleash your inner mechanic and ensure that no obstacle, no matter how rough the road may be, can hinder your off-road adventures.
Short Summary
- In order to successfully change a tire, it is important to properly inflate the new tire, securely attach it to the vehicle, and check for any potential leaks. These steps are essential in completing the process effectively.
- Properly preparing the bike before changing the tire ensures a smoother process.
- Steps to remove the old tire and mount the new one should be followed carefully.
- In order to successfully change a tire, it is important to properly inflate the new tire, securely attach it to the vehicle, and check for any potential leaks. These steps are essential in completing the process effectively.
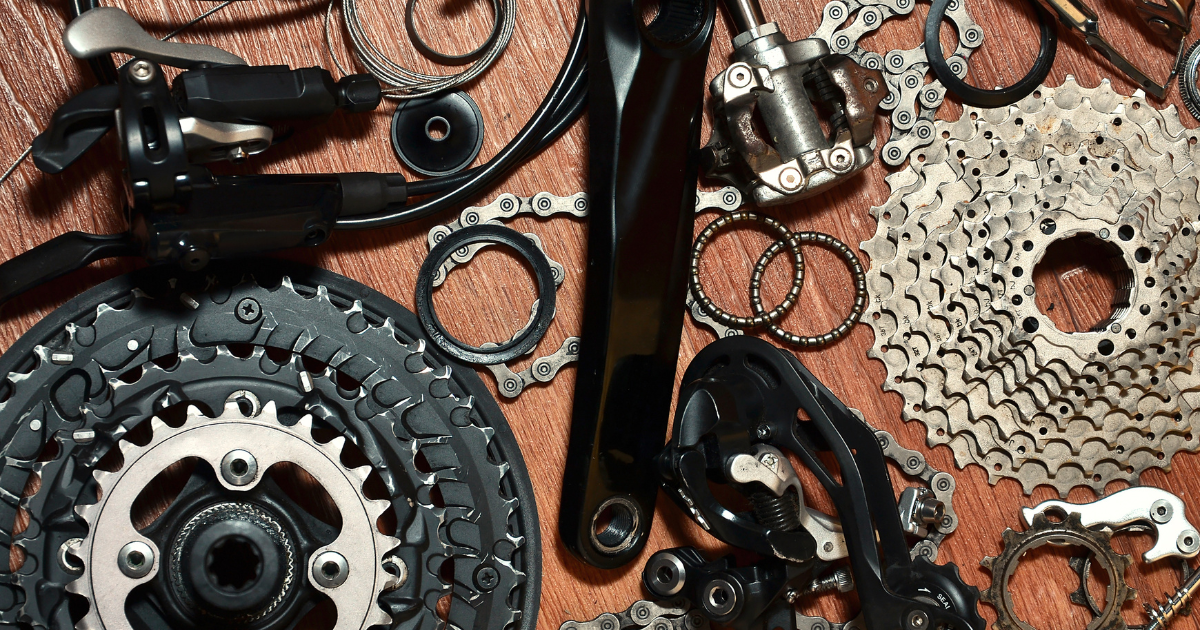
1. Gathering the Necessary Tools
Before you start changing the tire on your dirt bike, it’s important to gather all the tools you’ll need. Having the correct tools readily available will make the process much easier and more efficient. Here are the essential tools you’ll require:
Tire iron :
Having a strong and dependable tire iron is essential when it comes to changing a tire on a dirt bike. This tool offers the necessary leverage for removing the tire from the rim and installing a new one.
2. Tire spoon:
Another essential tool is a tire spoon, which helps remove the tire from the rim safely and without causing any damage to the tube or rim. Make sure to choose a tire spoon that is specifically designed for motorcycles.
3. Valve core tool
To deflate or inflate your tire, you’ll need a valve core tool that is compatible with your specific valve core type. This tool enables you to easily remove and reinstall the valve core.
4. Tire pressure gauge
Before and after changing a tire, it is crucial to check the tire pressure. To ensure optimal performance and safety, use a reliable tire pressure gauge to confirm that the tire is properly inflated.
Soapy water
Using soapy water can be helpful when mounting a new tire onto the rim. To make it easy to apply, mix a small amount of dish soap with water in a spray bottle. This will help lubricate the tire bead and facilitate the mounting process.
Rubber mallet
To properly seat the tire bead on the rim, a rubber mallet is a useful tool. It allows for gentle tapping that won’t cause any damage to the tire or rim.
MM wrench
To remove the tire from your dirt bike axle, you might need an MM wrench. Please refer to your bike’s manual for the specific size required.
8. Baby powder
Baby powder is a useful trick to prevent the tube from sticking to the inside of the tire. Dust the tube with a thin layer of baby powder before reinstalling it.
Optional: Rim lock:
If your dirt bike is equipped with a rim lock, it’s important to have the proper tools on hand in order to remove and reinstall it. Typically, this involves either a bolt or nut that securely fastens the tire to the rim, preventing any slippage.
2. Preparing the Bike
Before you jump into changing a tire on your dirt bike, it’s important to properly prepare the bike. Following these necessary steps will guarantee a seamless and successful tire replacement process.
1. Gather the necessary tools:
To change a tire on a dirt bike, you will need a few essential tools. Before you begin, make sure you have the following items ready:
Tire Iron: This essential tool is specifically designed to assist in the removal of a tire from its rim. Its sturdy construction and shape make it ideal for this task.
A tire spoon is a specialized tool that is specifically designed for the purpose of mounting and dismounting motorcycle tires.
Valve Core Tool: This tool is essential for removing and installing the valve core on a tire’s valve stem. With its use, you can easily service and maintain your tires.
In addition to the essential tools mentioned above, it would be helpful to have a set of wrenches and pliers on hand for the task.
2. Secure the bike:
Before you begin working on the tire, make sure that the bike is securely propped up on a stand or center stand. This will provide stability and make it easier to reach the tire. Also, ensure that the bike is on a level surface to minimize the risk of accidents.
3. Release the air pressure:
To release the air pressure, use a valve core tool to remove the valve core from the tire’s valve stem. This will help in easily breaking the tire bead from the rim.
4. Loosen the rim lock:
Before you try to remove the tire from your dirt bike, make sure to loosen the rim lock if it’s in place. The rim lock is designed to keep the tire from spinning on the rim during intense acceleration. Use a suitable wrench to loosen the nut of the rim lock, ensuring that you don’t fully remove it. (Keyword: rim lock)
To ensure a successful tire change on a dirt bike, it’s crucial to prepare the bike beforehand. Start by gathering all the necessary tools, making sure the bike is securely positioned. Then, release the air pressure and loosen the rim lock. These steps will help make the tire change process smoother and more efficient.
3. Removing the Old Tire
With all the necessary tools and equipment gathered, it is time to begin removing the old tire from your dirt bike. Follow these essential steps to ensure a safe and efficient tire change process:
1. Loosen the Rim Lock
Before taking off the tire, you need to release any tension from the rim lock. To do this, use a 10mm wrench and turn the rim lock nut counterclockwise. This will ensure that the tire can be easily removed without any restrictions.
2. Deflate the Tire
Before removing a tire, it’s important to deflate it first. Locate the valve stem and use a valve core tool to remove the valve core. Gently press down on the valve stem to release the air. Additionally, it’s always recommended to check the recommended tire pressure for your specific dirt bike usage.
3. Break the Bead
When removing an old tire, it’s crucial to start by breaking the bead. Place the tire on a flat surface and use a tire iron or spoon to insert it between the edge of the tire and the rim. Apply downward pressure to pry the tire away from the rim. Repeat this process around the entire tire until the bead pops off the rim.
4. Apply Soapy Water
To make it easier to remove the tire, apply a small amount of soapy water to both sides of the tire bead. This will lubricate the tire and facilitate the process.
5. Use Leverage to Remove the Tire
To remove the tire from the rim, carefully insert tire spoons or a sturdy tire iron between the tire bead and the rim. Apply leverage in a circular motion around the rim, ensuring not to cause any damage. With some mechanical skills, you can effectively detach the tire from the rim.
As someone who has dealt with stubborn tires before, I can tell you that having a good tire iron and tire spoon can truly make all the difference when it comes to removing them.
6. Remove the Valve Cap and Stem
Before completely removing the tire, it’s important to first take off the valve cap and stem. This step ensures that no damage occurs to the valve while you continue with the rest of the tire removal process.
4. Mounting the New Tire
After successfully removing the old tire from your dirt bike, the next important step is mounting the new tire. This part of the tire-changing process is crucial and requires careful attention to ensure a secure fit. Follow these essential steps to expertly mount the new tire:
1. Prepare the new tire:
Before installing the new tire, carefully inspect it for any defects or damage. Make sure that the tire meets the specifications required for your dirt bike and is suitable for your specific needs.
Before you begin, make sure you have all the tools you’ll need: a reliable tire iron, tire spoon, valve core tool, rubber mallet, and soapy water.
If desired, you can choose to apply a small amount of tire paste, such as Hunter Engineering tire paste, to the edge of the tire. This can assist with mounting and create a more secure seal.
2. Position the tire on the rim:
To install the new tire on a flat surface, place it with the tread facing down. Make sure that the rim of the dirt bike is aligned with the tire so that they are both parallel.
To mount the tire onto the rim, use your hands to push one side of the tire starting at the valve stem. Gradually work your way around, pressing the tire firmly onto the rim.
3. Use leverage:
To mount the tire onto the rim, you can use a tire iron to assist with leverage. Simply insert the tire iron between the edge of the rim and the tire bead.
To remove the tire, apply steady pressure and go around the rim, using the tire iron to lift it over the edge. Take care not to harm the rim or pinch the inner tube.
4. Ensure proper seating:
After partially placing the tire on the rim, make sure that the tire bead is evenly and securely seated all around the rim circumference. This indicates correct positioning.
If the bead on the tire is not seated evenly, you can gently tap it into place using a rubber mallet. Begin at the valve stem and proceed around, tapping lightly until the bead properly seats itself.
5. Install the valve stem:
To insert the valve stem, simply place it through the designated hole in the rim. To secure it tightly, you can use either a valve stem tool or a pair of pliers to tighten the valve stem nut.
6. Inflate the tire:
After successfully mounting the new tire onto the rim and securing it with the rim lock, it’s time to inflate the tire to the correct pressure. Proper tire inflation is crucial for optimal performance and safety. Follow these steps to inflate your dirt bike tire like a pro:
5. Inflating the Tire
Once you have successfully mounted the new tire onto the rim and secured it with the rim lock, it is important to inflate the tire to the correct pressure. Proper tire inflation is essential for both performance and safety. Follow these steps to ensure that you inflate your dirt bike tire properly: 1. Begin by connecting the air compressor or pump to the valve stem on the tire. 2. Slowly add air while monitoring the pressure using a gauge, making sure not to exceed the specified maximum pressure for your particular tire. 3. Periodically check the pressure as
1. Gather the necessary tools:
To properly inflate your motorcycle tires, you will need a few tools: an air compressor, a tire pressure gauge, and a valve core tool. Make sure that your air compressor is in good working condition and has the appropriate attachment for inflating motorcycle tires.
2. Remove the valve cap:
Unscrew the valve cap from the valve stem. This will allow air to flow into the tire.
3. Attach the air compressor:
Connect the air compressor to the valve stem with a firm grip. Make sure the connection is secure to prevent air leaks.
4. Check the recommended tire pressure:
To find the appropriate tire pressure for your dirt bike, consult the manual or check the tire manufacturer’s specifications. This information is typically provided in pounds per square inch (PSI).
Inflate the tire:
To inflate the tire, start the air compressor and carefully add air while regularly monitoring the pressure gauge. Continuously check the pressure and slowly increase the air until it reaches the recommended PSI.
Double-check the pressure:
After reaching the desired tire pressure, it’s important to turn off the air compressor and promptly check the pressure using a tire pressure gauge. This ensures an accurate measurement since the pressure may slightly fluctuate after inflation.
Adjust if necessary:
To lower the tire pressure to the recommended PSI, gently press the valve core tool onto the valve stem until some air is released. Make sure to avoid deflating the tire below the recommended level.
8. Replace the valve cap:
After inflating the tire to the appropriate pressure, make sure to firmly screw on the valve cap. This will help safeguard the valve stem from dust, debris, and moisture.
Ensuring the appropriate inflation of your dirt bike tire is crucial for achieving optimal performance and safety. To achieve this, utilize an air compressor and adhere to the recommended PSI. Before reattaching the valve cap, double-check the pressure using a gauge.
6. Securing the Tire
After properly mounting the new tire on the rim and fully seating the bead, it’s important to secure the tire in place to ensure it stays securely attached as you ride. Follow these essential steps to expertly secure the tire:
Install the Rim Lock:
The rim lock is an essential part that prevents the tire from rotating on the rim, especially during intense off-road riding. Make sure to position the rim lock securely against the inner tube valve stem hole on the rim.
2. Tighten the Rim Lock:
Use a 10mm wrench to tighten the rim lock nut securely. This ensures that the rim lock remains firm and doesn’t loosen during your ride.
3. Inflate the Tire:
Before fully securing the tire, make sure to inflate it to the correct pressure. You can find the recommended pressure specific to your dirt bike in the manufacturer’s guidelines. To achieve the desired pressure, use an air compressor.
4. Apply Bead Sealer :
To ensure a secure seal between the tire bead and the rim, it can be helpful to apply a small amount of soapy water to the edge of the tire. This lubrication allows for smoother placement of the bead and helps prevent air leaks.
Use a Rubber Mallet :
Gently tap the side of the tire with a rubber mallet to help ensure that the tire is properly seated against the rim. Take care to be gentle and avoid any potential damage to either the tire or rim.
Replace the Valve Cap :
After securely seating and properly inflating the tire, remember to replace the valve cap. The valve cap serves an important purpose in protecting the valve stem from dirt, moisture, and debris, which ultimately helps maintain optimal tire performance.
7. Checking for Leaks
Once you have successfully changed a tire on your dirt bike, it is important to inspect for any possible leaks to ensure that the bike functions properly and is safe to ride. Follow these steps for a thorough leak check:
After changing a tire on a dirt bike, it’s important to check for leaks. You should inspect the valve stem, valve core, tire bead, and rim lock for any signs of damage or abnormalities. Applying soapy water can help identify air leaks, and make sure to properly inflate the tire to the recommended pressure. Addressing any leaks or issues promptly ensures optimal performance and safety.
8. Reassembling the Bike
After successfully changing the tire, it’s important to reassemble the dirt bike to ensure its safety and readiness for the trails. Here is a detailed guide on how to properly reassemble your dirt bike after replacing the tire:
Install the Rim Lock:
Begin by installing the rim lock onto the wheel. The purpose of the rim lock is to keep the tire in place, especially during rough off-road rides. Use a tire iron to securely tighten the rim lock.
2. Attach the Valve Stem:
Attach the valve stem to the rim, making sure it is securely tightened to avoid any air leakage. To facilitate inflation at a later stage, use a valve core tool to remove the valve core.
3. Lubricate the Bead of the Tire:
To make it easier to mount the tire onto the rim, apply a small amount of soapy water or tire paste to the tire’s bead. This will help the tire slide onto the rim smoothly.
4. Seat the Tire Beads:
To mount the tire onto the rim, begin by aligning the valve stem with the valve hole. Use your hands to carefully push the tire onto the rim, and then utilize a tire iron or spoon to slowly work your way around the circumference of the rim. Exercise caution throughout this process to ensure that the tire bead remains in the center groove of the rim.
Inflate the Tire:
To properly inflate the tire, use an air compressor and follow the pressure guidelines provided by the manufacturer. As you inflate, make sure to monitor the tire bead to ensure it seats correctly on the rim. Pay attention for any popping or cracking sounds that could indicate an improper seal.
Check for Leaks:
Once you have inflated the tire, spray some soapy water around the edge of the tire and valve stem. If you see any bubbles forming, it means there is a leak. To fix the leak, tighten the valve core or adjust the tire position as necessary.
Reinstall the Valve Cap:
Once you have fully inflated the tire and ensured that there are no leaks, simply reattach the valve cap to the valve stem. This will provide added protection for the valve against dirt and debris.
8. Final Inspection:
Before hitting the road, it’s important to conduct a comprehensive examination of your tire to ensure it has been correctly installed and aligned. Carefully inspect the tire for any bulges, irregularities, or indications of damage. To further confirm its proper seating on the rim, gently tap around the tire using a rubber mallet.
After successfully reassembling your dirt bike and changing the tire, it’s important to take it for a test ride to ensure that everything is functioning properly. This will allow you to assess how the bike feels and performs.
Conclusion
First, locate the wheel on the axle that has the valve stem. Use a pencil to mark the lug bolt holes on the side of the wheel. Place the lug bolt over one of the marked lug holes and use a wrench to drive it into the wheel. Tighten the lug bolt with a wrench, applying 10-15 ft-lbs of torque. Repeat these steps for the other side of the wheel.
To remove the tire, shift your bike into first gear and let the rear wheel spin freely. Hold onto one part of the tire with one hand while using your other hand to twist counter clockwise on the valve stem to release any remaining air pressure in it. Once you have removed all air from it, remove and discard old tire– making sure to dispose as mandated by local law or community guidelines. Finally, install resplacement tyre in same manner-issue free disassembly along taking care not overtightening metallic fasteners (which may cause further damage).